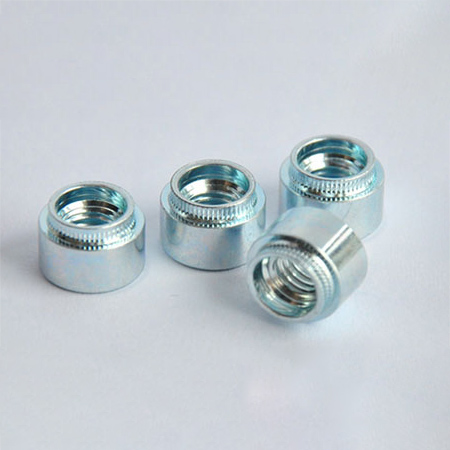
Flower Tooth rivet nut inserts are a reliable fastening solution designed for applications where access is only available from one side of the workpiece. Their unique “flower tooth” design provides enhanced grip and anti-rotation performance, making them ideal for sheet metal assemblies in industries like automotive, aerospace, electronics, and construction.
To ensure a secure and lasting installation, it’s essential to follow the correct procedure. This guide walks you through each step of the installation process, helping reduce errors and avoid product failure.

Before starting, make sure you have the following:
A compatible rivet nut tool (manual, pneumatic, or hydraulic)
Properly sized mandrel and nosepiece for your selected insert
Drill or punch (for creating the hole)
Caliper or gauge (for measuring hole size)
Safety gear (gloves and eye protection)
Choose the correct Flower Tooth Rivet Nut Insert based on:
Thread size (e.g., M4, M6, M8)
Grip range (thickness of the sheet metal)
Material compatibility (Stainless Steel, aluminum, carbon steel)
Head style (flat head, countersunk, hex head)
Check the technical datasheet to ensure the insert matches your application requirements.
Drill or punch a hole in the sheet metal to the specified hole diameter for your rivet nut. Use a caliper to verify accuracy.
Tip: Avoid oversized holes—this will compromise the grip strength and torque resistance.
Place the Flower Tooth Rivet Nut Insert into the prepared hole. Make sure it sits flush against the surface. The flower tooth design will help resist spinning during the tool operation.
Screw the rivet nut onto the mandrel of your installation tool until snug. Ensure the tool’s nosepiece aligns correctly with the head of the rivet nut.
Operate the tool (squeeze the handle or activate the trigger, depending on the type) to pull the threaded shank of the insert. This action deforms the backside, anchoring the rivet nut securely.
Once complete, the tool will disengage or require manual unscrewing from the installed insert.
Inspect the insert for:
A tight fit with no gaps between the flange and surface
No visible cracks or deformation on the part
Proper alignment of the threaded section
You can now screw a bolt into the installed rivet nut to complete your assembly.
| Issue | Possible Cause | Solution |
|---|---|---|
| Rivet nut spins in the hole | Hole too large or low clamping force | Verify hole size and tool pressure |
| Deformed insert | Tool over-tightened | Adjust tool settings and follow torque guidelines |
| Insert sits unevenly | Hole not perpendicular or surface uneven | Re-drill hole and check work surface |
Improved load-bearing performance
Long-lasting thread integrity
Minimized risk of product failure
Efficient and repeatable assembly process
Installing Flower Tooth Rivet Nut Inserts is a straightforward process when the correct steps and tools are used. Their superior anti-rotation features and ease of single-sided access make them an excellent choice for demanding applications.
For best results, always follow manufacturer specifications, perform quality checks, and consider custom solutions if your project requires special materials or dimensions.